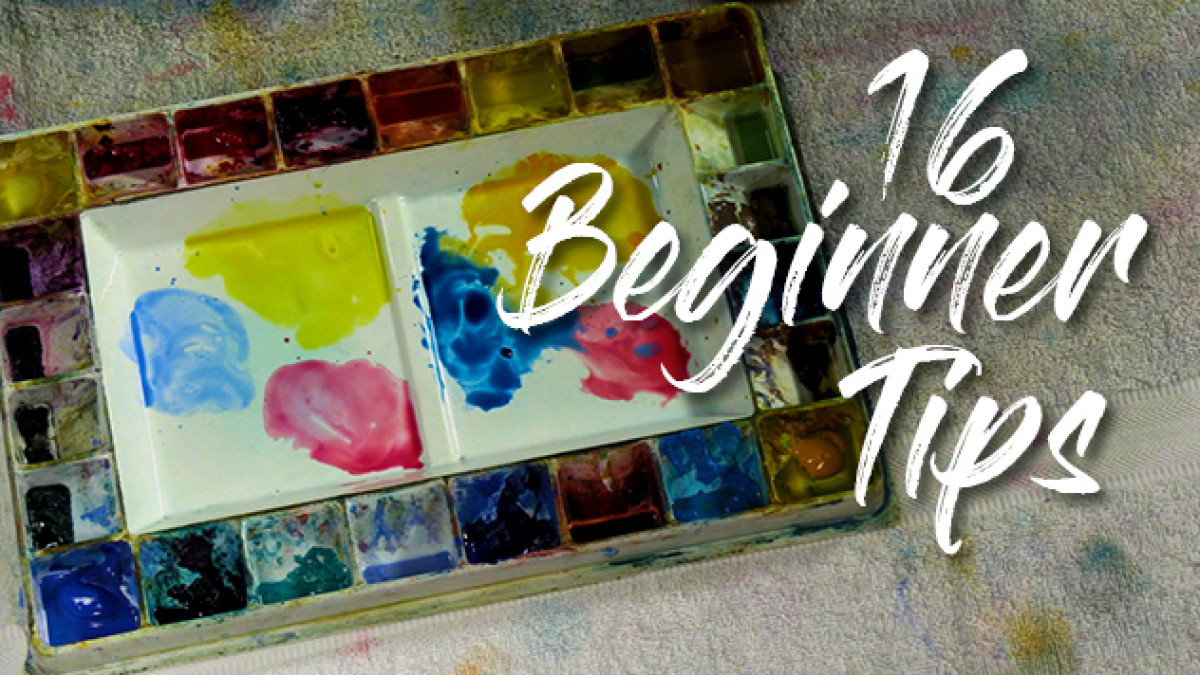
16 tried-and-true tips for successful watercolors.
 Jess Rice
SUMMARY: Creating successful paintings in watercolor begins with using the best materials you can, followed by how you get organized to paint.
Creating successful paintings in watercolor begins with the materials you use followed by how you get organized. In this article, I will also share with you some tips on how to mix your colors and organize them in your paintings. I have been painting for over 20 years and I have taught thousands of students and this is my best advice to you.
(Watch quality videos on these topics on the Arts of Course YouTube channel)
16 simple things to know:
- Student Grade vs. Artist Grade Paper
- Watercolor Blocks vs. Sheets of Paper
- How To Rip Watercolor Paper
- Why Rough, CP (Cold Press) or HP (Hot Press) paper?
- Student Grade vs. Artist Grade Paint
- What Watercolors Should You Buy?
- How Do They Make Watercolors?
- Using Gouache
- Choosing Your Brushes
- How to Clean and Store Your Watercolor Brushes
- All About Palettes
- Using the Terry Cloth Towel Method vs. Taping or Stretching Your Paper
- Mixing Colour On Your Paper and Keeping Your Colors Fresh
- Using Watercolor Pencils
- Creating Value Sketches And Why They Are So Helpful
- Creating Values With Watercolors
1- Student Grade vs. Artist Grade Paper
Many of my students show up to class with student-grade paper. Of course, everyone thinks just because they are starting out, they need to purchase the cheapest supplies they can. Actually, it is the opposite, when you are just starting out on your watercolor adventure you should purchase and paint on artist-grade paper to ensure you will have a pleasant experience with your first run at paintings.
Artist-grade watercolor paper is meant to be abused, it absorbs water and pigments much easier, and can be scraped, scrubbed, and covered with thick paint. It is tough enough to withstand all that experimentation you will throw at it. You will have a much better experience right out of the gate starting with quality paper.
Artist-grade paper is made from 100% cotton and generally has a watermark stamped into it, either on one corner or on one end of the paper. If you hold the paper up to the light to view it, you can see the watercolor stamp. If that stamp is reading correctly that is the top or front of your watercolor paper and is the side that you should use to paint on. When the manufacturers make artist-grade paper, they add an ingredient to the mixture called sizing. This is a sticky substance that allows your paper to absorb water and gives something for your pigment to stick to. With artist-grade paper, they mix the sizing throughout the paper making it more stable and absorbent. One of the bonuses of using artist-grade paper is that you can use both sides; the top is ideal to paint on, but for practice, you can always use the backside of a failed watercolor.
To keep student-grade paper more affordable manufacturers will add fillers such as wood chips during the paper-making process. Also, to keep costs down they don’t add sizing throughout the paper. They will generally just spray it on one side, making your paper somewhat absorbent on that one side. Thus, student grade paper doesn’t hold up as well as artist grade and will start breaking down once it gets too wet, and you can only use one side as your water will not absorb on the backside.
Student-grade paper also doesn’t have a watermark or name brand stamped into making it harder to figure out what is the front or back of the paper. When they package your paper, they put it right side up in the packaging so the first thing you want to do is place a small “x” on the backside of each sheet so you can easily tell what the front side is when you pull out your sheet to paint on.
(Read more or watch this video about student vs artist Grade Paper)
2- Watercolor Blocks vs. Sheets of Paper
There are several different options when it comes to watercolor paper types. The paper I choose depends on where I am painting. If I am painting plein air (outside), I will generally choose to bring a watercolor block along to paint on. Watercolor blocks are meant for travel, they generally have 20 sheets of paper that are stacked and glued on 4 sides to make a block, so they stay nice and flat and will not curl when you wet them. When you are done with one sheet, you can remove it from the block to reveal a new painting surface. Blocks also provide a heavy cover that folds over to keep your watercolor surface from getting scratched when traveling.
If I am at home in my studio, I choose to paint on sheets of paper, it is not as expensive as a block and I can rip it to any size I wish to paint on. I like to paint on full-size sheets using lots of water and juicy paint.
(Read more or watch this video about blocks vs sheets of Paper)
3- How To Rip Watercolor Paper
You really should rip your watercolor paper rather than cut it. Ripping the watercolor paper gives you a beautiful, ragged edge that makes the edge of the watercolor paper interesting to look at, and you cannot help but running your finger along that rough edge. Having that ragged edge is also used when you frame your watercolor using the “floating” method.
When you rip your paper make sure you start with the front of the paper facing up, try not to touch the surface of the paper too much as the oil from your fingers can come off and leave an oily spot on your paper, water and paint will not stick to this area. When you handle your watercolor paper, try to touch it only by the edges.
Fold your paper in half so the front of the paper is on the inside, crease the fold line with your fingers to break the seam of your fold. Open the paper back up and fold the other way. Remember this now the front side of your paper again so be careful not to touch it too much. Crease the fold on this side. Open your paper back up and holding it in both hands fold it back and forth breaking the seam even more.
Lay your paper face up and flat on a clean surface and place a straight edge along your fold. With one hand apply pressure to the straight edge to hold it tight against the paper. With the other hand hold the upper right corner of the paper and begin pulling it toward you and begin ripping from the top of your paper, continue to pull and rip until the rip is at the level of your hand that is holding the straight edge. Slide your hand down the straight edge so you hold the next section of the paper tight against the surface, continue to pull the watercolor paper towards you ripping as you go, repeat all the way down until you have ripped the paper in half.
If you don’t move your hand down as you rip the paper it may not tear along your folded seam and not tear in a straight line, and you will get a jagged edge.
I generally rip watercolor paper into half sheets, quarter sheets, and eighth sheet sizes. With these standard sizes, you can mat them in standard frame sizes, which are much cheaper to purchase than nonstandard sizes.
(Read more or watch this video about how to rip your watercolor paper)
4- Why Rough, CP (Cold Press) or HP (Hot Press Paper?
Rough Paper would be my choice of paper if I were painting an animal and I wanted a lot of texture in its fur or background. Rough paper has large dimples in the paper that trap all that beautiful pigment you float out onto your watercolor paper and is what gives your watercolor their sparkle.
If I am painting landscapes, and I don’t want such a rough texture, but still want a bit of texture to show through I will choose a Cold Press paper. Cold Press paper does not have such deep dimples, but you are able to add a bit more detail to your paintings because the paper is a bit smoother.
Hot Press paper is something I would use if I were painting subject matter with a lot more detail, such as architecture or portrait paintings. Hot Press paper is quite smooth and is fun to work on, it soaks up water much differently than Cold Press or Rough so try it out on a small piece of paper before you start into your watercolor project.
(Read more or watch this video about paper textures)
5- Student-Grade vs. Artist-Grade Paint
Just like the saying goes, you get what you pay for. Not only is it true for paper, it is also true for paints. I recommend my beginner students purchase fewer colors and better quality when they are choosing the paints they want to use. There is a myriad of brands that make watercolors, and it is really a personal choice of the ones that fit your needs.
It is pretty basic really, artist-grade paint has more pigment in it and less filler, and student-grade paint has less pigment and more filler. With more pigment, your colors are going to be richer, and you are not going to have to layer over the top so many times to get the desired richness you are looking for. Student grade paints will not be as rich and to get a wider range of colors will often mix colors to create a new color. Using these colors can cause a muddy effect when mixed with other colors.
(Read more or watch this video about student vs artist grade paint)
6- What Watercolors Should You Buy?
I have been using Daniel Smith paints for most of my painting career, but I like to experiment with new paint brands (So note that the color names that follow are for Daniel Smith paint, as color shades and their names can vary from one brand to the next).
I recommend starting out with six colors: three cool and three warm.
For my three cool colors, I like Aureolin Yellow, Rose Madder Genuine, and Cobalt Blue as my three cool colors. They are very transparent and when you are just starting out you will not go too dark with your watercolors, which is what generally happens your first couple of tries. After you get used to mixing and layering these three colors, I would add three warm colors to your palette, I’m really liking New Camboge as my warm yellow, Permanent Alizarin Crimson as my warm red, and Phthalo Blue as my warm blue. These three colors are also more opaque and can create richer darks.
Once you have those six colors figured out, you can start adding some other colors to play with. Phthalo Turquoise is a nice color to have in your arsenal. I also like Ultramarine and for real darks, Perylene Maroon.
You will most likely see other colors you would like to introduce to the mix, I say do it slowly, swap out your yellow, and see how that changes up your mixes.
7- How Do They Make Watercolors?
Making your own watercolor pigment is easier than you think and very gratifying in the sense of accomplishment. Anyone can go out and buy pigment but making your own adds another level of artistic ownership to your work. One of the cool things about mixing your own pigment is that you can mix colors that truly fit your needs. Maybe you like Raw Sienna but wish it were just a bit darker or had a bit redder ocher in it. You can come up with your own variations.
Basically, to make your own pigment you need ground pigment and a binder to mix the pigment into, something that will keep it wet and hold the pigment together until you put it onto wet paper or add water to it. You can grind your own pigment out of all sorts of materials such as stone, plants, or even insects. There are several options for binders as well, two of the most common are gum Arabic and/or honey.
The ratio to mix your pigment is about 3 to 1, with that being three parts binder to 1 part pigment, I use a small palette knife and a palette to mix the two together, mixing until it is nice and smooth. Test for richness on scrap paper and adjust by adding either more pigment or binder. When satisfied add to your palette.
I have found by mixing my own pigment that I can create a rich, dense pigment this fits my needs. As well as to give my watercolors that beautiful base color I am looking for.
(Read more about making your own watercolors)
8- Using Gouache
When I first started painting watercolors, my goal was to leave some of the white paper showing through for my lightest lights. Sometimes that is not as easy as it looks, especially when you get caught up in all the excitement of the painting process and go right over your white areas.
Using a very opaque gouache can aid you in getting some of your whites back. To apply the gouache your paper should be bone dry and you will want to lay down several layers of the gouache until you achieve the white that suits your needs. You will want to dry your paper between each application.
A couple of different areas that you can use gouache is in the highlight of an animal’s eye or in a scene with water. It works well to get that frothy edge of the rushing water a bright white.
(Read more or watch this video about how to fix your whites)
9- Choosing Your Brushes
There are million different brushes you can buy to start painting watercolors. The round, the flat, and the angled brush are the three that I would recommend to start with.
I use a round brush to carry lots of pigment and lots of water between my palette and my paper. These come in different sizes from very small: number 4, number 6; up to very large: number 20s and number 40s. I mostly use a number 14 round.
The round brush has a thin tip to it. It gets fat in the middle where it is quite hollow and it comes back down to a tip where it’s connected to the ferrule of the brush (the metal part that connects your brush hairs to the handle). That center section where it’s all hollow is where all your pigment and water sit.
The other brush I like to use is a big flat brush. I use it for skies and for doing lots of grass work in the foregrounds. A square brush or a flat brush doesn’t carry as much pigment and water onto the paper. So, you’re actually not introducing as much water into your paper using a big flat brush.
Similar to a flat brush is an angle brush. With an angle brush you just have a little bit more control. The tip of your angled brush helps you get into little nooks and crannies. Again, it doesn’t carry as much paint and water, so you’re not introducing as much water into your watercolor while you’re painting; to do that, you want to use a round brush.
The difference between an expensive brush and a less expensive brush is the quality of the bristles. A high-end brush is made of natural hairs and will give you much more water retention and pigment retention in the bristles.
A less expensive brush is made with synthetic fibers or synthetic bristles. Still works well, not quite as expensive but doesn’t load as much water and paint into it. You’ll get a lot more paint and water into a natural bristle.
(Read more or watch this video about watercolor brushes)
10- How to Clean and Store Your Watercolor Brushes
It takes time to find the brushes that best fit your style of painting and are comfortable to work with. Once you have the brushes you like, it takes using them over and over to break them in so they become an extension of you. Best to keep your brushes in good working order and keep them soft and pliable so they will last a lifetime of painting.
I have had some of my watercolor brushes for over 25 years, and I feel one of the keys to keeping my brushes for so long is that I never allow water to come over the ferrule of the brush (the metal part that connects your brush hairs to the handle). When I fill my water containers I only add enough water so that when I stick my brush into the water container the level of water does not come over the metal part of the brush, keeping it dry. If you allow water to get down into the ferrule of your brush it breaks down the glue that holds the brush together and the head of your brush may pop off.
When you are done using your brushes make sure to rinse them off with lukewarm water until all the paint is removed.
Once a week or so I will condition my brushes with either manufactured brush cleaner or you can also use a mild dish detergent. I place a small amount into the palm of my hand and start swirling the brush around to coat the bristle in soap. Once your brush is sufficiently lathered up, rinse off all the soap until water runs clean out of the brush. Dry your brush and run the bristles through your fingers to create a sharp point or chisel shape.
To store my brushes, I keep them in a bamboo mat holder. I like this type of holder for my brushes as it lets the air flow through, keeping my brushes nice and dry. I generally store my brushes tip down so if there is any moisture left in the brushes it will run out keeping them dryer as well.
11- All About Palettes
There are a wide variety of palettes to choose from and it really depends on how you are going to spend your time painting and in what setting. Throughout your painting experience, you will most likely gather several palettes as you try them all out. Believe me, I have tried out many different palettes over my painting career and have settled on two different palettes that cover my painting situations.
I paint plein air (outside) quite a bit and for this, I like a smaller palette that can fit into my backpack or suitcase. A good feature of a travel palette is to have a lid that snaps shut and keeps any leftover paint contained, and not leaking all over the rest of my gear.
In my home studio, I like a Robert E. Wood palette as it has the features that I appreciate. This palette comes with a solid cover which when used in combination with plastic wrap can keep your palette paint nice and wet for weeks. This palette also has larger paint wells where I can squeeze out lots of color that will help me in creating rich, bold paintings. The best feature of this palette is its large mixing areas giving me enough room to mix enough pigment and water to paint a full sheet of watercolor paper.
Other palettes that you might find that work for you are the butcher block palette which gives you a very large mixing area, best for a very limited palette as all your colors will mix together at some point. Or a small personal palette that you can use while sitting having coffee in a coffee shop or on a plane.
(Read more or watch this video about painting palettes)
12- Using the Terry Cloth Towel Method vs. Taping or Stretching Your Paper
I am a spontaneous watercolor artist, so I like to have materials ready to go at a moment’s notice. I have tried all sorts of methods of prepping my watercolor paper so it will remain flat throughout the painting process. The best method I have found that works for me is the terry cloth towel method.
I have seen artists glue the edges of the paper to a board and then cut it off after you have completed a painting. This method takes up too much time to prep and I have an aversion to cutting watercolor paper. I like that natural rough edge of the paper.
Taping your watercolor paper down to a board works well. I do use this method for smaller paintings such as greeting cards. My biggest problem with taping my paper down is that when you are painting a wet into wet wash like a large sky and you run your brush over the taped area the water pools there. And if you are not careful or watching, the collected water runs back into your painting creating a huge bloom into the beautiful wash you just laid down.
Like I have said, I really like to see the edges of the watercolor paper and I like to have my painting go right off the edge of the paper.
The best solution I have found for this is by using a terry cloth towel as your base to work on. I prefer white, but you could use a gray-toned towel as well. I avoid bright-colored towels as they will affect how you view the colors you are adding into your painting. The towel gives me a nice surface to work on, and as your painting and towel gets wetter the fibers of the towel start holding the paper in place helping to keep your paper flat. If you are using artist-grade paper your paper is less apt to curl and buckle. Having the towel under my work area also gives me a nice area to wipe my brush on helping to keep my brush the perfect temperature (moisture level).
Plus, I can float a wet, juicy wash out onto my paper and run it right off the edge, the towel will soak up the excess water and paint with no chance of water running back into my painting creating bleeds or blossoms into my wash.
(Read more or watch this video about different painting setups)
13- Mixing color on your paper and keeping your colors fresh
Do your colors appear flat and muddy? To take care of this issue I like to let my colors mix right on my paper. With this method, you will get a lot more color variations and your colors will stay fresher and more interesting to look at.
I start by wetting the area of my painting I want to work on, once my water has soaked in and my paper starts to lose its shininess, I am ready to start adding pigment. In my palette I pull out a dab of fresh paint and start adding water to it, diluting the pigment down and making sure it is mixed up in my brush, I don’t want any clumps of dry paint sticking to the side of my brush.
I pretty much use my brush as a delivery tool to pick up wet paint out of my palette and carry it to the wet area of my paper.
With my loaded brush, I touch the tip or the blade of the brush to the wet area letting the pigment slide off my brush and into the wetness of the surface of the paper. If my paper is wet enough the paint should start spreading or spidering out onto the paper. I add as much paint as I want to that area. Now to mix another color and with the same process lay that color right next to the first color on the paper. I can force some of the new color into the first color as well but for the most part, I will let the two colors mix on their own creating their own colors.
I keep repeating this process letting single colors mix with other colors to create interesting color combinations. For example, if I lay down a yellow first and then start adding red, the edges where they mix start to turn orange giving me three colors to look at: the yellow, the red, and now the orange. If I add blue on the other side of the yellow, they mix to create a green, now I have five colors, a yellow, a red, an orange, a blue, and now a green. If my blue and red start mixing that gives me purple, completing my color wheel of all my primary and secondary colors.
If I had mixed all those colors on my palette, I would have less variety and variety is the spice of life!
(Read more or watch this video about mixing colors)
14- Using Watercolor Pencils
Watercolor pencils are fun to work with on their own. The pencils are watercolor pigment that reacts when mixed with water. You can do small little paintings using the pencils on their own.
They can also be used in conjunction with your watercolor paints. Use them to draw your sketch on the watercolor paper, and when you wash or paint over them, they can blend completely into your painting. Unlike graphite pencils which remain visible and permanent after wetting.
You can also make small fixes to your completed painting. With your pencil fill in an area you want to change and brush over it with a bit of water.
(Read more or watch this video about how to use watercolor pencils)
15- Creating Value Sketches And Why They Are So Helpful
I cannot emphasize sketching enough; our level of painting ability comes down to how well we can sketch. I have found that you can save a lot of frustration in painting your watercolor if you spend at least 10 minutes sketching your painting to figure out a few things before you start in with color.
I try to at least do a 3-step value scale sketch. With any pencil and in a sketchbook draw three squares stacked on top of one another, leave your top one white, the second one shade slightly, and the third one shade even darker. You should now have 3 values of color: a white, a mid-tone gray and a dark color/black.
Now create a small sketch of your painting. It does not have to be that good; it just needs the major elements. Start with the big shapes.
Now assign a value from your 3-step value chart to each element of your painting, don’t worry about what color elements are going to be, just whether they are going to be light or dark. Be creative and try to make interesting shapes of value putting light up against dark.
(Read more or watch this video about value sketching)
16- Creating Values With Watercolors
Once I have my value sketch done, I now have a map to follow with my watercolor. This makes the watercolor process so much easier, and you will not get as lost along the way.
With some upfront planning think about what colors you want in your painting. To start with I use the white of my paper for the lightest values of my painting and then use transparent colors for the mid-tone values and then more opaque colors for the darker value areas.
Start light and slowly build your dark colors up, you can complete your painting in several layers, no need to go so dark the first wash. Adjust light and dark values as you go.
It is good practice to do a small color value painting before you tackle your larger painting, you will soon learn to appreciate the time you took to do this step as it will save you a lot of frustration in the long run.
(Read more or watch this video about colors and values)
READY TO LEARN MORE?
Check out our great watercolor painting courses HERE.
Categories: : Watercolor tips