A step-by-step guide to painting a Coastal Landscape
 Sylvie Peltier
SUMMARY: Taking the Coastal Landscape mini-course will perfect your wet-on-wet and wet-on-dry techniques. Follow this easy step-by-step guide.
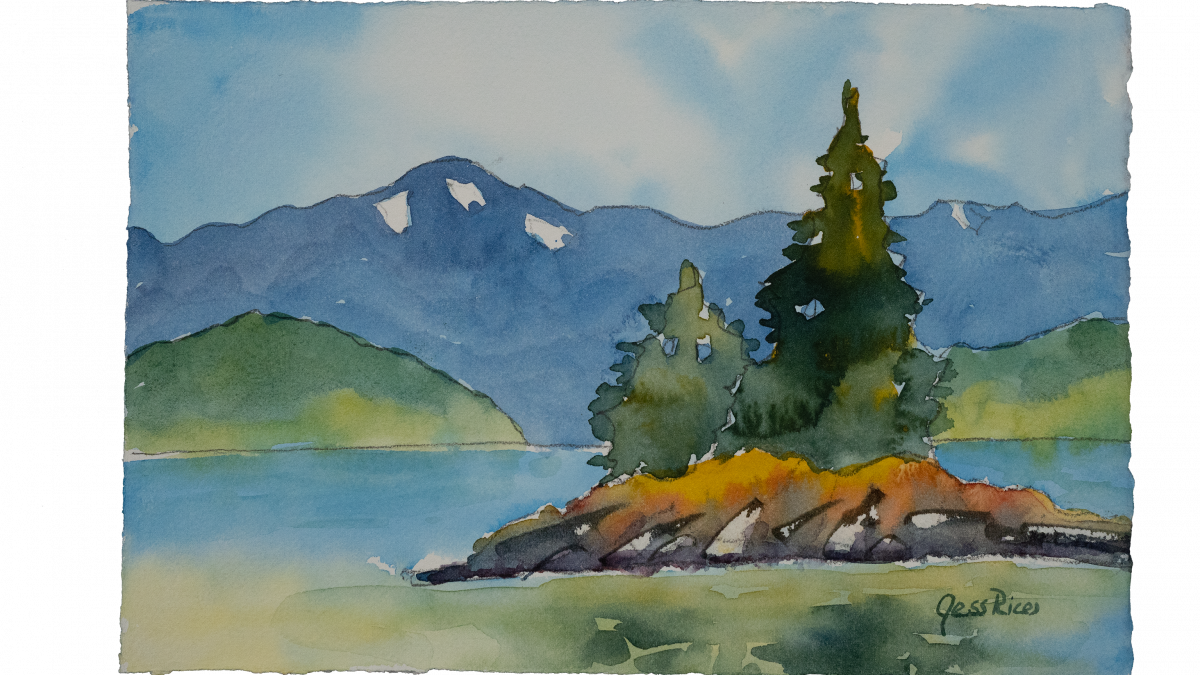
The stunning scenery of the West Coast has inspired artists forever. Accomplished artist Jess Rice has travelled extensively along the coast of British-Columbia and he loves to paint the small islands that dot the coast and give it its personality.
So we were delighted when we filmed our Coastal Landscape mini-course with Jess. He teaches you how to paint a watercolor landscape step-by-step and the mini-course is also great practice for painting rocks and water reflections.
Jess starts with the wet-on-wet technique and moves on to the wet-on-dry technique for the remaining washes.
After we filmed our Coastal Landscape mini-course I decided to give it a try.
I painted on a 7.5 in x 11 in, Fabriano Artistico 140lb cold press 100% cotton paper.
It took me about an hour to complete the painting. Jess's instructions were clear and concise.
I started by transferring the sketch included in the minicourse. Jess mostly used a #14 round, turning to a #5 round for some small details. I used a #12 without any issue. He also used an old credit card for the rocks.
Color-wise, Jess used Daniel Smith: Aureolin Yellow, New Gamboge, Alizarin Crimson (permanent), Cerulean Blue, Cobalt Blue, and Phthalo Blue Red Shade.
Here are the steps that I followed:
1. Wet the sky, mountains and trees down to the rocks, also making sure to leave the snowy parts of the mountains white.
2. Load your brush with Cerulean Blue and cover the wet area with that color. Leave some whites in the sky (for clouds) and the mountain (for snow).
3. Wet the ocean.
4. Mix some richer Cerulean Blue and apply along the horizon line, being careful not to touch the top part. Stop painting by the base of the island.
5. Mix some Auroelin yellow and put in the ocean.
6. Mix some New Gamboge into your Cerulean blue to create a green and paint below the trees to create some water reflections.
7. Blow dry your painting.
8. Erase some of your pencil lines in the mountains and the trees.
9. Mix some Phthalo Blue and Cerulean Blue so that it is darker than the sky. Add a touch of Alizarin Crimson to give it a slight purple tinge.
10. Paint the mountains, going around your trees. Add some of that color in the holes in the trees.
11. Wet your rocks lightly.
12. Paint the top part of the rocks loosely with New Gamboge.
13. Add some Alizarin Crimson to the middle part of the rocks, touching the New Gamboge.
14. Grab some Phthalo blue and paint the rest of the island at the base, letting it run into the rest of the rocks.
15. Using an old credit card, scrape away some rock shapes. If the paint is not ready, it will fill the space back up when you test it. Make a variety of shapes.
16. Using a small no. 5 brush, drop some dark purple along the bottom of the island and pull some tiny specks of purple in the water.
17. Add some New Gamboge in the ocean to evoke the reflection of the rocks in the water.
18. Mix a little bit of Phthalo Blue into the New Gamboge and paint the resulting dark green in the water to create the reflection of the trees.
19. Dry your painting.
20. On to the headlands: mix Aureolin Yellow and Cobalt Blue making sure it is darker than the mountain behind.
21. Paint the upper part of the headlands with that green. Add some yellow to your paint mixture and paint the lower part of the headlands. Add some of that color to the water to show the reflection of the headlands.
22. For the trees, start with New Gamboge. Apply loosely to the trees. Then grab some Phthalo Blue and add to your trees, letting the two colors mix together while still letting some yellow showing through.
23. Add some edges on the trees with some Phthalo Blue.
24. Mix a very dark purple from your Phthalo Blue and Alizarin Crimson, and paint the bottom edge of the island. Pull some of that paint up into the rocks.
And voilà! Here's my own rendition of the Coastal Landscape.

I had a great time doing this painting and I hope you do too! I can't wait to try it again.
If you wish to follow along with the video like I did, click here.
Interested in learning more?
FREE MINI COURSE: Watercolor Techniques: How to develop your own unique style
Paint a beautiful coastal landscape using the wet-on-wet and wet-on-dry techniques

Categories: : Watercolor Techniques, Watercolor tips