A step-by-step guide to painting a colorful rooster
 Sylvie Peltier
SUMMARY: I tried the course on how to paint the Best-in-Show rooster and this is how it went.
With their bright feathers and spunky attitude, roosters make for a wonderful watercolor painting subject.
Growing up on a ranch, Arts of Course watercolor coach Jess Rice looked after many roosters and has painted hundreds of them over the years.
So we were very excited when we filmed Jess teaching how to paint a colorful rooster.
For one thing, Jess knows the rooster's anatomy from experience, so his directions are grounded in reality. But at the same time, he really knows how to exploit the best of watercolors to create a stunning specimen.
Jess started with the wet-on-wet technique, showing how to wet the paper correctly. The painting was accomplished over 4 washes, each wash bringing more life into the rooster.
After we filmed our Best in Show Rooster course I decided to give it a try.
I painted on a 11 in x 15 in, Arches 140lb cold press 100% cotton paper.
Counting the time taken to transfer the sketch included in the course, wetting my paper and just enjoying the process, it took me under 3 hours to complete the painting. Jess's instructions were great. He always explains the reasons behind his brush strokes in clear and concise terms.
Jess mostly used a #14 round, turning to a #5 round for smaller details. I used a #12 instead of the #14 without any issue. Jess also used masking fluid for the eye and a one-inch flat brush for the background.
Color-wise, Jess used Tri-Art paints, but I used my Daniel Smith colors with the help of the Paint Substitution Chart included in the course: Aureolin Yellow, New Gamboge, Pyrrol Red, Alizarin Crimson (permanent), Cerulean Blue, Cobalt Blue and Phthalo Turquoise.
Here are the steps that I followed:
First wash
1. After transferring the sketch to the paper (with the window method) I used some masking fluid to preserve the white in the rooster's eye.
2. Then, I wetted the rooster thoroughly, avoiding my pencil lines.
3. The first wash consisted of putting the first layer of color to the entire rooster: Red for the comb and waddle, yellow for the cape, Phthalo Turquoise for the body and tail feathers. The wing was painted with a mixture of the Alizarin Crimson and Aureolin Yellow applied so that you also have some orange areas. A very watered down mixture of that color was then feathered into the upper saddle, where the back meets the tail feathers. The lower part of the wing was a mixture of Alizarin Crimson and Phthalo Turquoise.
4. The tail feathers were painted in Phthalo Turquoise using long stokes in the shape of the feathers.
5. Then I used some yellow for the legs, leaving the claws untouched for now. If some of the colors moved onto other areas because of the water, it was a happy accident!
6. Then I rinsed my brush and filled in some of the white areas next to my pencil lines.
Second wash
7. Using a kneaded eraser, I removed most pencil lines, making sure to avoid the area with masking fluid.
8. Then, with the tip of my large brush, I darkened the back waddle and the base of the comb with Alizarin Crimson and feathering the color out.
9. Same thing at the base of the cape, to separate it from the wing, and around the eye.
10. Then, using Phthalo Turquoise, I pushed paint up into the yellow cape on its right shoulder to create more separation in the feathers.
11. I added another layer of Phthalo Turquoise on the body below the wing and at the bottom of the bird, feathering the paint out.
12. I painted along the edges of the tail feathers to help distinguish them, feathering the paint out each time.
13. Using my #5 brush, I painted the dark part of the eye with a mixture of turquoise and crimson.
14. Then, with my large brush, I used the same color mixture to add details to the cape where it meets the wing.
15. Back with the small brush I painted the back leg with a watery turquoise.
Third wash
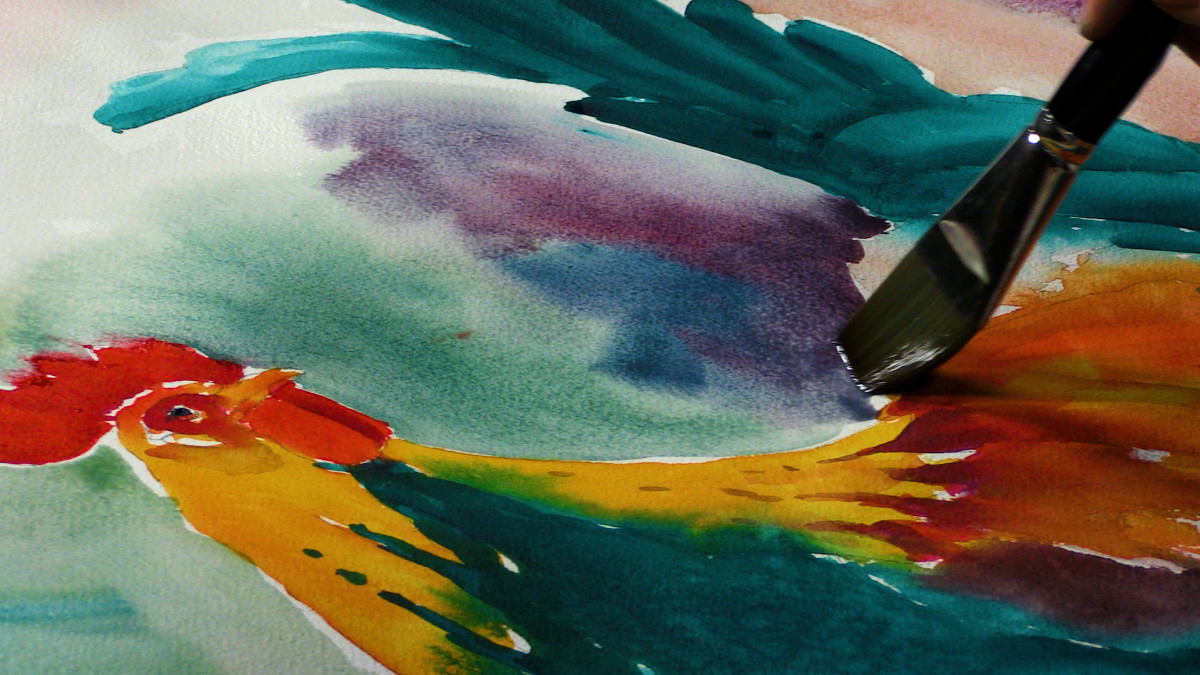
16. After having made sure that the painting was all dried, I moved on to the background.
17. Using a large flat brush I wetted the background with large rounded strokes.
18. Mixing crimson, yellow and cereluan blue, I created a greenish neutral color and painted the lower part of the paper, starting by cutting along the rooster's feet.
19. Then, to contrast with the turquoise on the body and tail feathers, I added a little crimson to the neutral green and painted the right side of the background using large curving strokes.
20. I added a little yellow and blue to the neutral mixture and painted around the head and cape.
21. Once all the background was covered, I used a wet brush to pull the background pigment in tighter along the rooster.
Fourth wash
22. This was all about adding the details. Making sure my painting was completely dry, I removed the masking fluid on the eye.
23. With my #5 round, I shaved the highlight on the eye with a dark mixture of turquoise and crimson.
24. I rinsed my brush and added some crimson around the eye, feathering it out. Then I added crimson to the top of the left waddle, suggesting the beak's shadow. I also darkened the back waddle along the front one.
25. Using the tip of my brush, I painted the pencil line separating the beak with a mixture of crimson and turquoise.
26. I rinsed my brush and added some dark crimson to the base of the comb, feathering up the color.
27. Using some yellow, I followed the pencil lines on the sketch to define the ear (this course was a great rooster anatomy lesson!).
28. I mixed a dark green with my Cobalt Blue and New Gamboge and, using a #8 round, I painted shadows along the bottom of the feet.
29. Going back to my #12, I grabbed some Phthalo Turquoise and defined the tail feathers. I also added some below the wing, feathering to darken the lower part of the rooster. Then I applied the same color to separate the wing from the tail.
30. Using short strokes, I added some more turquoise to the top feathers of the tail to add more definition.
31. Then, with a dark mixture of crimson and turquoise I painted the wing along the cape and feathered the color into the wing.
32. Adding more definition between the cape and the neck, I painted a dark turquoise along the cape and feathered it into the neck.
33. With my cerulean blue, I painted the base of the claw and feathered them up. This time I also added some light blue onto the claws.
Final touches
34. Using a small dental brush, I created some highlights by pulling some of the paint up in various areas on the cape, the tail feathers and the left waddle.
35. I let my painting sit for a day and then I signed it.
And voilà! Here's my own rendition of the Best in Show Rooster!

I can't wait to try it again and I hope you enjoy painting it too.
Interested in learning more?
Paint a colorful rooster with confidence by taking our online course.

Categories: : Watercolor Techniques, Watercolor tips